1.) Full/Empty-Calibration, Block Distance and Sensitivity
To change the full/empty calibration or other settings of the tag your Micropilot FWR30 asset is assigned to, choose “Edit” in its context menu (“three dots menu”) in the “All Objects” list of the Netilion Value application.
Please note: You will need sufficient access rights on the tag in order to change its configuration. If the “Edit” button or the context menu are greyed out, please ask the tag’s owner for writing permissions. If you can’t find the tag in the list at all, please ask the tag’s owner for reading permissions.
The following screen will open and lets you change the configuration of your tag:
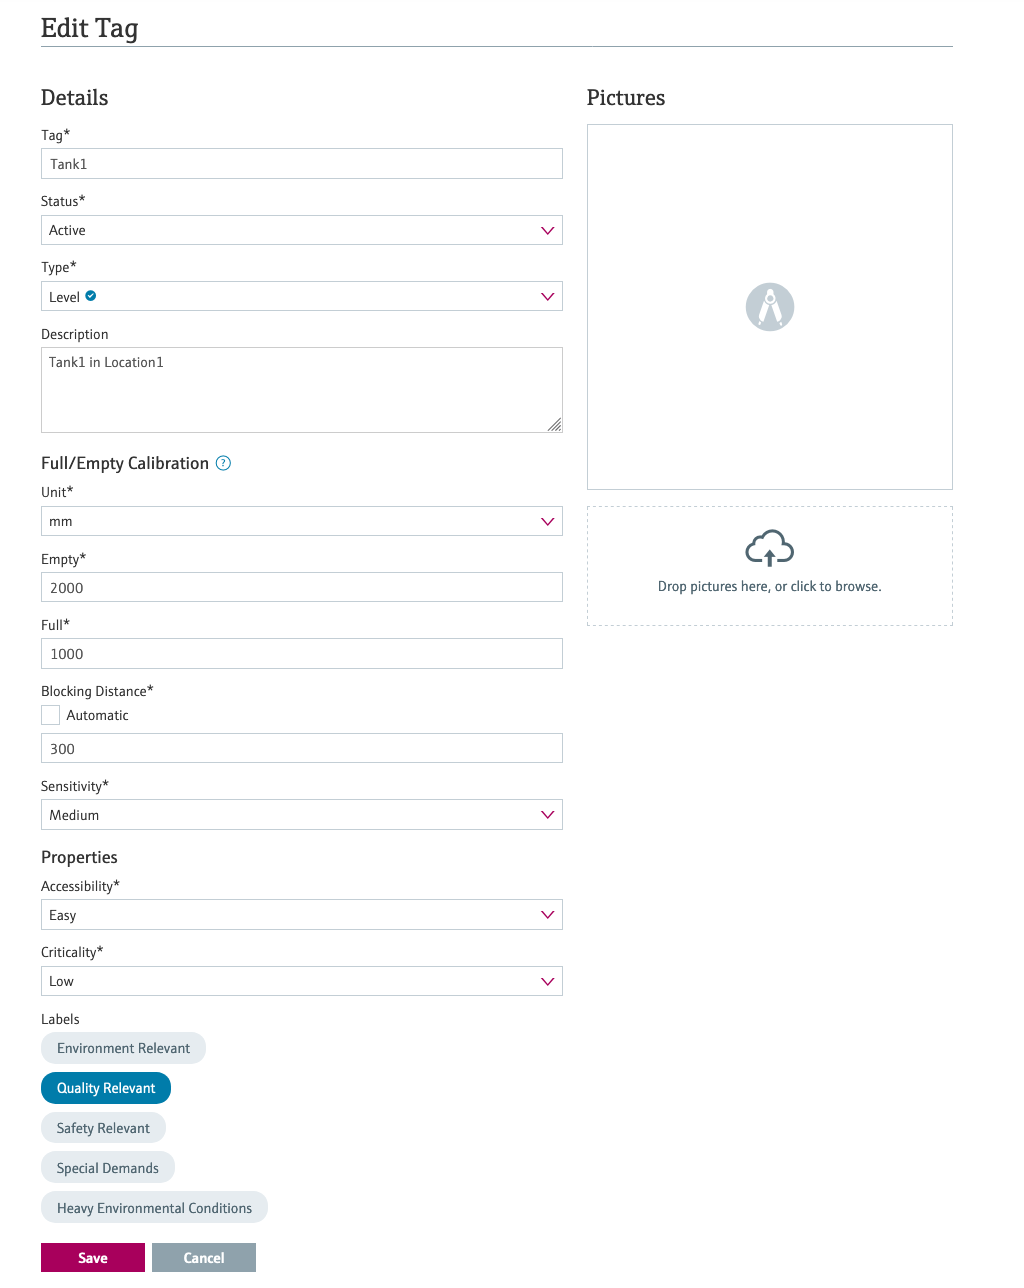
To change the full/empty calibration of your tag, please scroll down to “Full/Empty Calibration”. You can change the following values there:
| Unit: | The unit for the following fields (mm, cm, m, ft, in) |
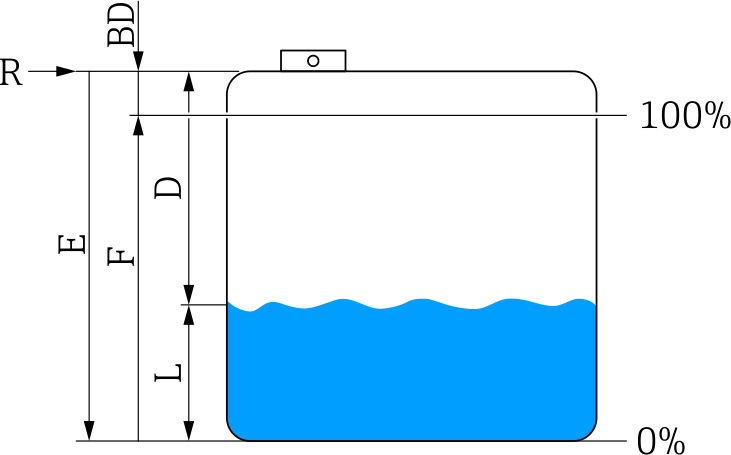
| Empty (E): | The distance from the Micropilot FWR30 device to the minimum level (usually the bottom of the tank) |
| Full (F): |
The maximum level measured from the bottom of the tank |
| Blocking distance (BD): | The blocking distance defines a blind area in which possible interferences, like a vessel wall or condensate formation, can be suppressed. With the help of the blocking distance function, a blind area can be set additionally and independently from the full/empty calibration. |
| Sensitivity: |
The parameter describes how sensitive the sensor should detect the reflected microwaves. The reflection is in association with the dk of the filling medium. If the filling medium has a low reflection, the sensitivity can be set to high in order to detect a better signal. If the filling medium has a high reflection, the sensitivity can be set to low in order to reduce possible confounding factors. |
Please confirm the changes by clicking on the “Save” button. Your changes will be either applied when the next transmission interval is reached or if you want the changes to be applied immediately, please press the blue button on the Micropilot FWR30 device until the LED at the front of the device shines green.
2. Measurement and Transmission Interval, Time of first Measurement, Activation and Deactivation of the device
To change the measurement interval, the transmission interval, the time of the first measurement or to activate / deactivate the device, please open the asset settings by choosing “Edit” in the context menu (three dots menu) of your Micropilot FWR30 asset in the “All objects” list of the Netilion Value application.
Please note: You will need sufficient access rights on the asset in order to change its configuration. If the “Edit” button or the context menu are greyed out, please ask the asset’s owner for writing permissions. If you can’t find the asset in the list at all, please ask the asset’s owner for reading permissions.
The following screen will open and lets you change the configuration of your asset.
To change the measurement or transmission interval or the time of the first measurement, please scroll down to the “Connectivity Settings”. To activate or deactivate your Micropilot FWR30 device, please scroll down to “Activation status”.
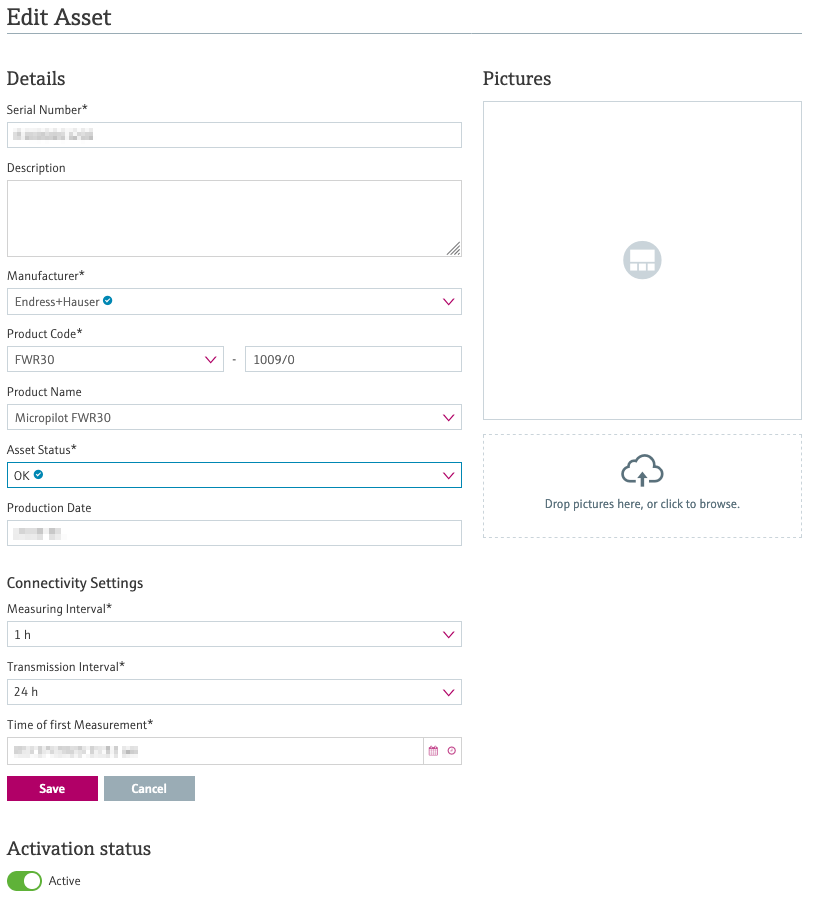
Connectivity Settings:
| Measuring interval: | Select the time interval the device should be measuring data (default: each 1h) |
| Transmission interval: | Select the time interval the device should transmit the measurements to the Netilion cloud (default: each 24h) |
Please note that the two intervals above have an influence on the device’s battery life: The more frequent measurements are taken and transmitted, the faster the battery will drain.
| Time of first Measurement: | The exact date and time the device should take the first measurement. Leave the default setting if you want to put the device into operation immediately. |
Please confirm the changes by clicking on the “Save” button. Your changes will be either applied when the next transmission interval is reached or if you want the changes to be applied immediately, please press the blue button on the Micropilot FWR30 device until the LED at the front of the device shines green.
Activation status:
Toggle the switch to either deactivate or activate your device.
After triggering the deactivation of the device, please confirm the following notification in order to prevent inadvertently deactivating your asset by entering the asset’s serial number shown in the notification:
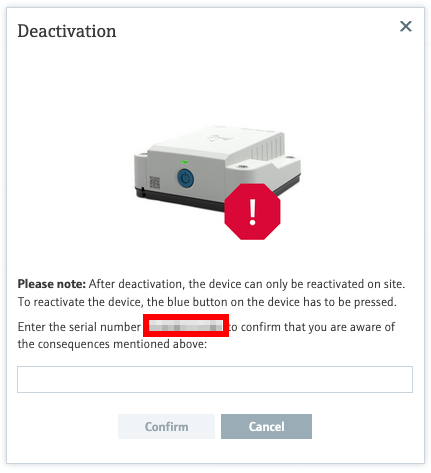
Please note that you will need physical access to your device in order to activate it again. So choose this option carefully.
After triggering the activation of the device, the following notification will appear:
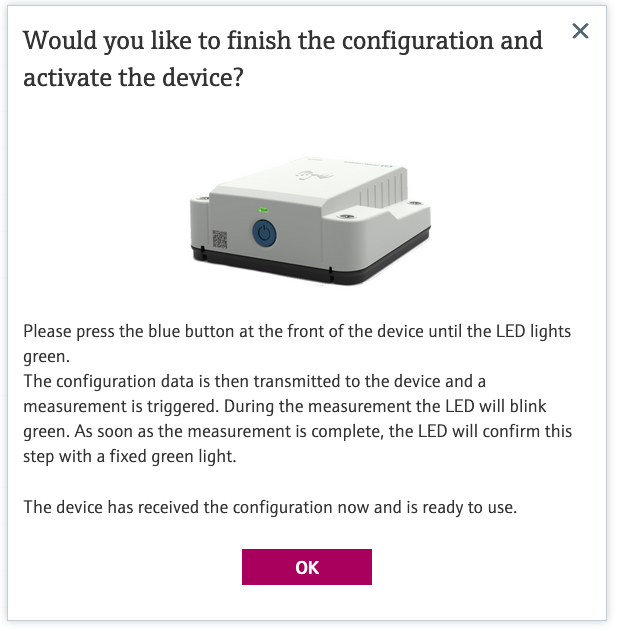
Please follow the given instructions to complete the activation of the device.